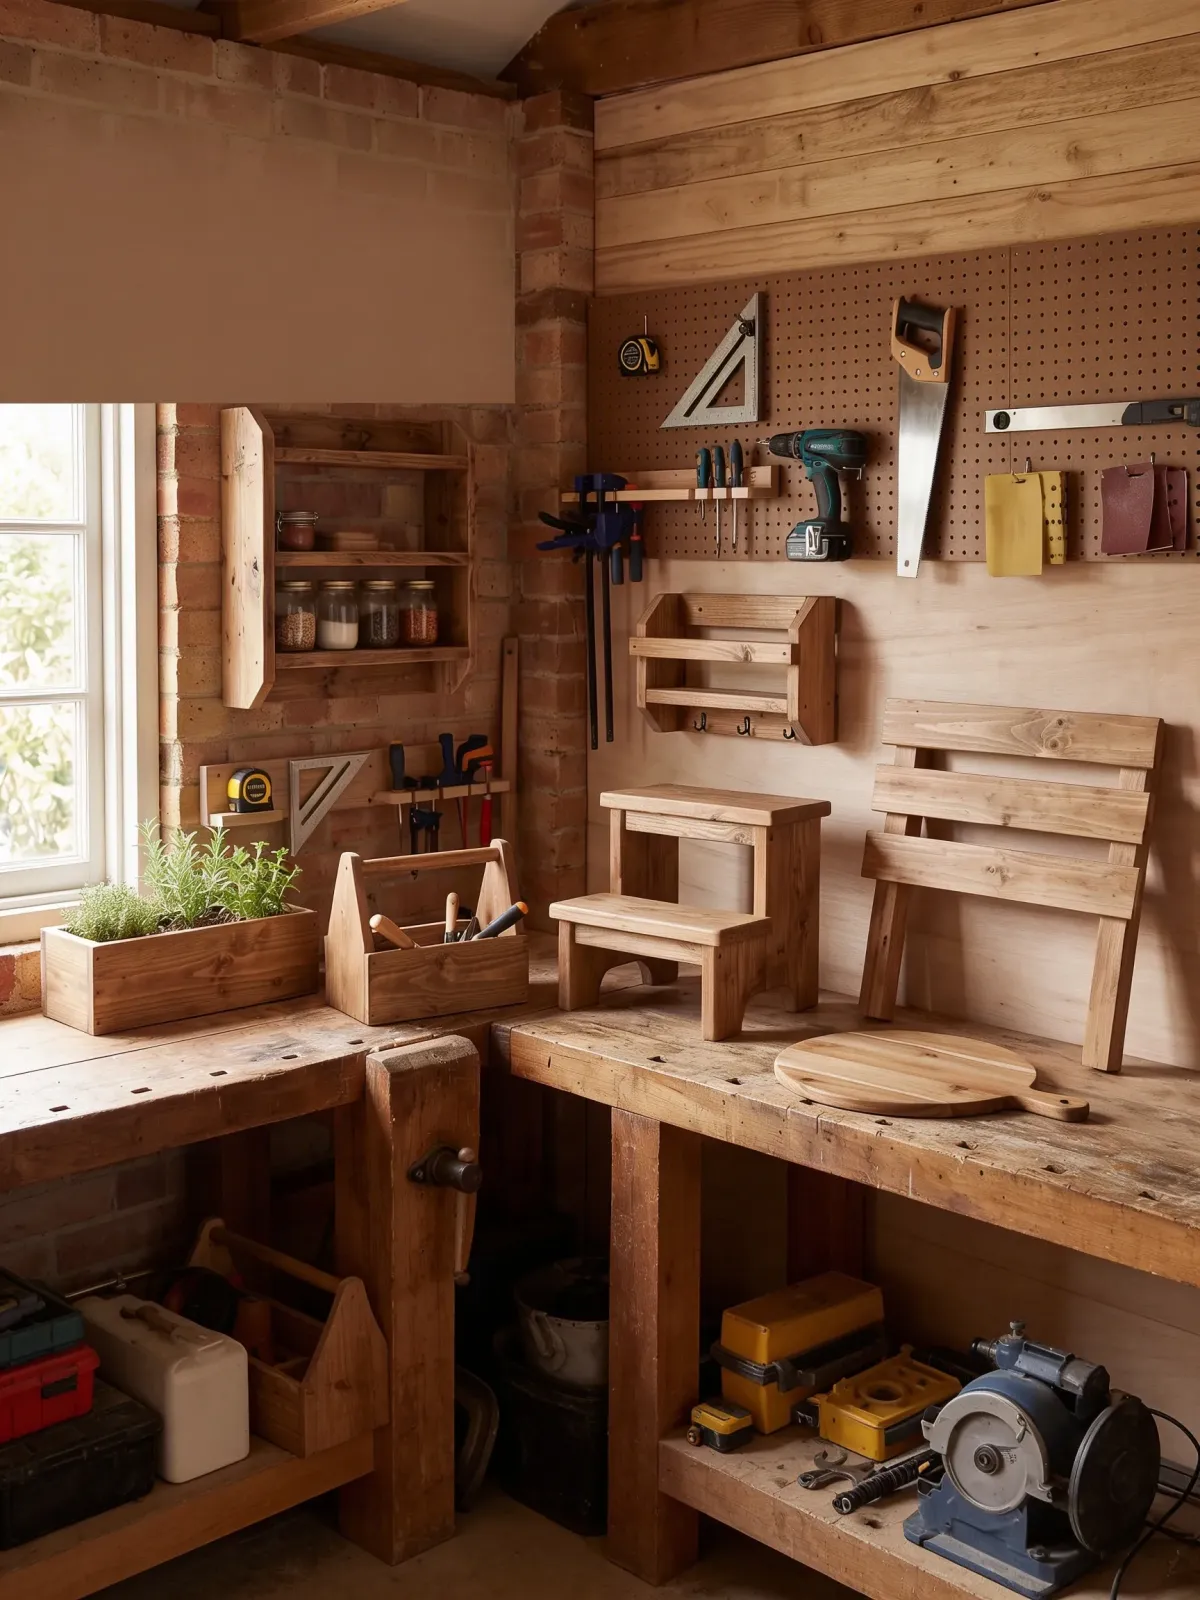
7 Useful Woodworking Projects You Can Build in a Weekend
You don’t need a full workshop, a wall of power tools or years of experience to make something useful from wood.
Some of the most satisfying projects are the simple ones. A shelf that fixes an awkward storage problem. A planter that makes the garden feel more finished. A tool tote that you’ll keep using for years.
The key is choosing a project that suits the time, tools and confidence you already have.
Here are seven practical woodworking projects you can realistically tackle over a weekend.
1. A simple wall-mounted shelf
A basic shelf is a good first woodworking project because it teaches you several useful skills without becoming overwhelming.
You’ll need to measure accurately, cut the timber to length, smooth the edges and fit the shelf level on the wall. The design can be as simple as one board supported by two brackets, or you can make wooden supports if you want more of a challenge.
Shelves work well in:
Kitchens
Utility rooms
Home offices
Garages
Sheds
Children’s bedrooms
Start with a smaller shelf rather than trying to fill an entire wall. It’s easier to handle, easier to fit and less expensive if you make a mistake.
Before drilling into a wall, make sure you understand what the wall is made from and use fixings designed for that surface. You should also check for hidden pipes and electrical cables.
A spirit level, tape measure, drill and saw will cover most of the work.
2. A wooden planter box
A planter box is straightforward to customise because you can build it around the space available.
A long, narrow planter can sit beneath a window or along a fence. A square planter works well on a patio. You could also make several matching boxes in different sizes.
The basic construction is usually four sides attached around a base. You can add feet to lift the planter from the ground and improve drainage.
For an outdoor planter, use timber and fixings that can cope with moisture. A suitable exterior finish will also help protect the wood.
Remember to include drainage holes. If water can’t escape, both the plants and the timber are likely to suffer.
You can line the inside with a suitable planter liner, but don’t create a sealed container that holds water against the wood.
This is also an easy project to adapt. Once you understand the basic box construction, you can use the same method to build storage crates, raised beds or small outdoor containers.
3. A basic tool tote
A wooden tool tote is essentially an open box with a handle, but it can be surprisingly useful.
You can use it to carry hand tools around the house, keep gardening tools together or store the items you reach for most often in the workshop.
A simple version needs:
Two side panels
Two end panels
A base
A handle
You can make the handle from a wooden dowel or shape one from a strip of timber.
This project gives you practice joining boards at right angles and keeping a box square during assembly. You’ll probably find clamps useful while the glue dries or while you fit the screws.
Don’t worry about making the first one perfect. A few small marks won’t matter on something designed for workshop use.
You can finish it with paint, clear oil or leave it unfinished if it’s only going to live indoors.
4. A small step stool
A step stool can be useful in the kitchen, garage or workshop, but it needs more care than a decorative project.
Because it will carry a person’s weight, the joints must be strong and the finished stool must sit flat without rocking.
For this reason, it’s better to follow a proven plan rather than making up the dimensions as you go.
Keep the design simple. A low stool with a wide base is usually a more sensible first project than a tall set of steps.
Pay attention to:
Timber thickness
Joint strength
Screw length
Overall stability
Smooth edges
A non-slip top surface
Test it carefully before regular use. If there’s any movement, splitting or weakness around a joint, don’t use it until the problem has been fixed.
This is a good project once you’ve completed one or two simpler builds and feel comfortable measuring, cutting and assembling accurately.
5. A workshop storage rack
Workshop storage doesn’t need to look polished. It needs to fit your tools and make them easier to reach.
You could build a rack for:
Clamps
Screwdrivers
Hand tools
Drill bits
Timber offcuts
Sandpaper
Garden tools
The best approach is to design the rack around the items you already own.
Lay the tools out first and measure the space they need. This avoids building something that looks good but doesn’t actually hold your equipment.
A clamp rack, for example, might only require a solid backboard with several timber supports. A screwdriver holder can be made by drilling a row of holes into a narrow board.
Keep some extra space for future tools, but don’t make the rack so large that it wastes wall space.
If you’re attaching heavy tools to a wall, make sure the rack itself and the wall fixings can support the load.
6. A simple garden bench
A full piece of furniture might sound ambitious for a weekend, but a basic garden bench can be manageable if you use a straightforward design.
Look for a plan based on simple cuts and screw-fixed construction rather than complex furniture joints.
A basic bench usually includes:
Two end frames or legs
A supported seat
A backrest
Bracing to stop movement
Outdoor furniture needs to cope with changing weather, so choose suitable timber, exterior-grade fixings and a finish designed for outdoor use.
Take extra care when building the frame. The bench should feel solid, sit level and resist sideways movement.
Round off sharp corners and sand any surface that people will touch. Nobody wants a splinter from a newly built garden bench.
If a full bench feels like too much for one weekend, start with a small outdoor side table. It uses many of the same skills but requires less material and is easier to move around while you work.
7. A serving board
A serving board is a good option when you want a smaller project with a finished result you can use straight away.
Choose a suitable untreated hardwood and avoid timber that has been chemically treated or coated with an unknown product.
The process is mainly about shaping and finishing:
Cut the board to size.
Mark any curves or handle shape.
Cut and refine the outline.
Sand through progressively finer grades.
Round over the edges.
Apply a food-safe finish if the board will come into contact with food.
You can keep the shape rectangular or add a handle with a hanging hole.
The sanding makes the biggest difference to the final result, so don’t rush it. Spend time removing saw marks and smoothing the edges evenly.
A serving board is also a useful way to practise with a jigsaw, sander or router without committing to a larger build.
Which project should you start with?
The best first project isn’t necessarily the most impressive one.
Choose something that matches your available time and tools.
A serving board or simple shelf is a good place to start if you’re new to woodworking.
A planter or tool tote gives you more practice assembling a box.
A storage rack works well when you want something practical and don’t care about a furniture-quality finish.
A stool or bench needs more accurate construction because it must safely support weight.
Before you begin, ask yourself:
Do I already have the tools?
Can I complete the project in the space available?
Do I understand how the parts fit together?
Can I get the correct timber and fixings locally?
Does the project involve any safety-critical joints?
Starting with a smaller project usually means you’re more likely to finish it.
The basic tools you’ll need
You can complete many of these projects with a modest toolkit.
A useful starting set includes:
Tape measure
Pencil
Combination square
Spirit level
Hand saw or jigsaw
Drill and driver
Drill bits
Screwdriver bits
Sandpaper or a sander
Clamps
Safety glasses
Dust mask
Hearing protection when using noisy tools
You don’t need to buy every tool at once. Choose your project first, then add only the tools that the job requires.
A few tips before you begin
Measure each part before cutting, even if you’re working from a plan.
Check that the timber is straight enough for the job. A badly twisted board can make a simple build much harder than it needs to be.
Dry-fit the pieces before adding glue or screws. This lets you spot errors while they’re still easy to correct.
Take your time with sanding. A basic project can look much better when the edges and surfaces feel properly finished.
Most importantly, choose something you’ll genuinely use.
A small project that solves a real problem around your home or workshop will usually feel more rewarding than a complicated build that never gets finished.